

So, you’ve just unboxed your Wonky Flowers. The stems are fresh, the colours are popping (or about to be), and there’s a cheeky bit of flower food waiting to be mixed in. You might’ve had a quick glance at our Petal Pointers guide in the box – a short, sweet how-to for getting your bunch looking its best.
But talk to any florist, and they’ll tell you there’s a lot more to the process. Prepping, processing, positioning… it’s part art, part science, part “trust your gut and hope for the best.”
If you’re someone who loves to dive a little deeper, buckle up – we’re about to take you on a creative ride. This is the full step-by-step guide for those who want to go beyond the quick-snip-and-plonk.
First: A Word on Flower Arranging (It’s Trickier Than It Looks)
Let’s be honest – arranging flowers can feel daunting. It looks easy enough in your head (or that Pinterest board), but getting your bunch to look just-so can be another story.
In reality, flower arranging is a skill – one that takes time, practice, and a bit of experimentation. You might not nail it the first time. That’s fine. That’s exactly what this is about: learning, trying, tweaking, and upskilling – week after week, with fresh seasonal stems.
You might also be someone who chucks them in a vase and calls it a day. That’s also completely fine. There’s no wrong way to Wonky. This guide is just here if you’re curious, keen, or want to give your blooms their best shot at vase greatness.
In this blog, we’ll cover:
Ready? Let’s go.
This is the florist’s not-so-secret weapon. Conditioning means giving your flowers time to rehydrate and recover from their journey. Yes, even though they were packed fresh at the grower, the trip can leave them looking a bit wilted or tired. Don’t stress - they just need a drink.
Here’s how to do it:
While your flowers take a drink, you can dive into your veg box and start plotting dinner.
Set your stems down, queue up a playlist, and let the creativity flow.
Short on time? You can skip the conditioning step and go straight to arranging. But flowers are easiest to style (and look their best) when they’re fully hydrated, so we recommend giving them a little soak if you can.
You don’t need a full florist kit to make your flowers shine. Just a couple of basics will do:
Bonus: A clean tea towel or soft cloth is handy for wiping down your vase and clearing space on your bench. Flower arranging can get a little splashy.
No fancy floristry vessels required – but there are a few good rules to follow.
Got a short stem left behind? Don’t throw them! Mini jars, bottles or bud vases are great for cut-down blooms and you’ll be surprise how few you need to fill a small vessel. Perfect for your desk, bedside, or gifting a posy to a mate.
Now the fun bit.
Top tips:
Once your stems are in, the job’s not quite done. Here’s how to keep your bunch blooming:
And just a reminder - flowers change over time. Feel free to rearrange your bunch as the week goes on. Trim a few stems down, move some into smaller jars, or share a bloom or two with a friend. There’s no one right way to enjoy them.
We’d love to see what you create! Tag us on socials@wonkybox.nz, send us a snap, or let us know how you got on – wild and wonky arrangements welcome.
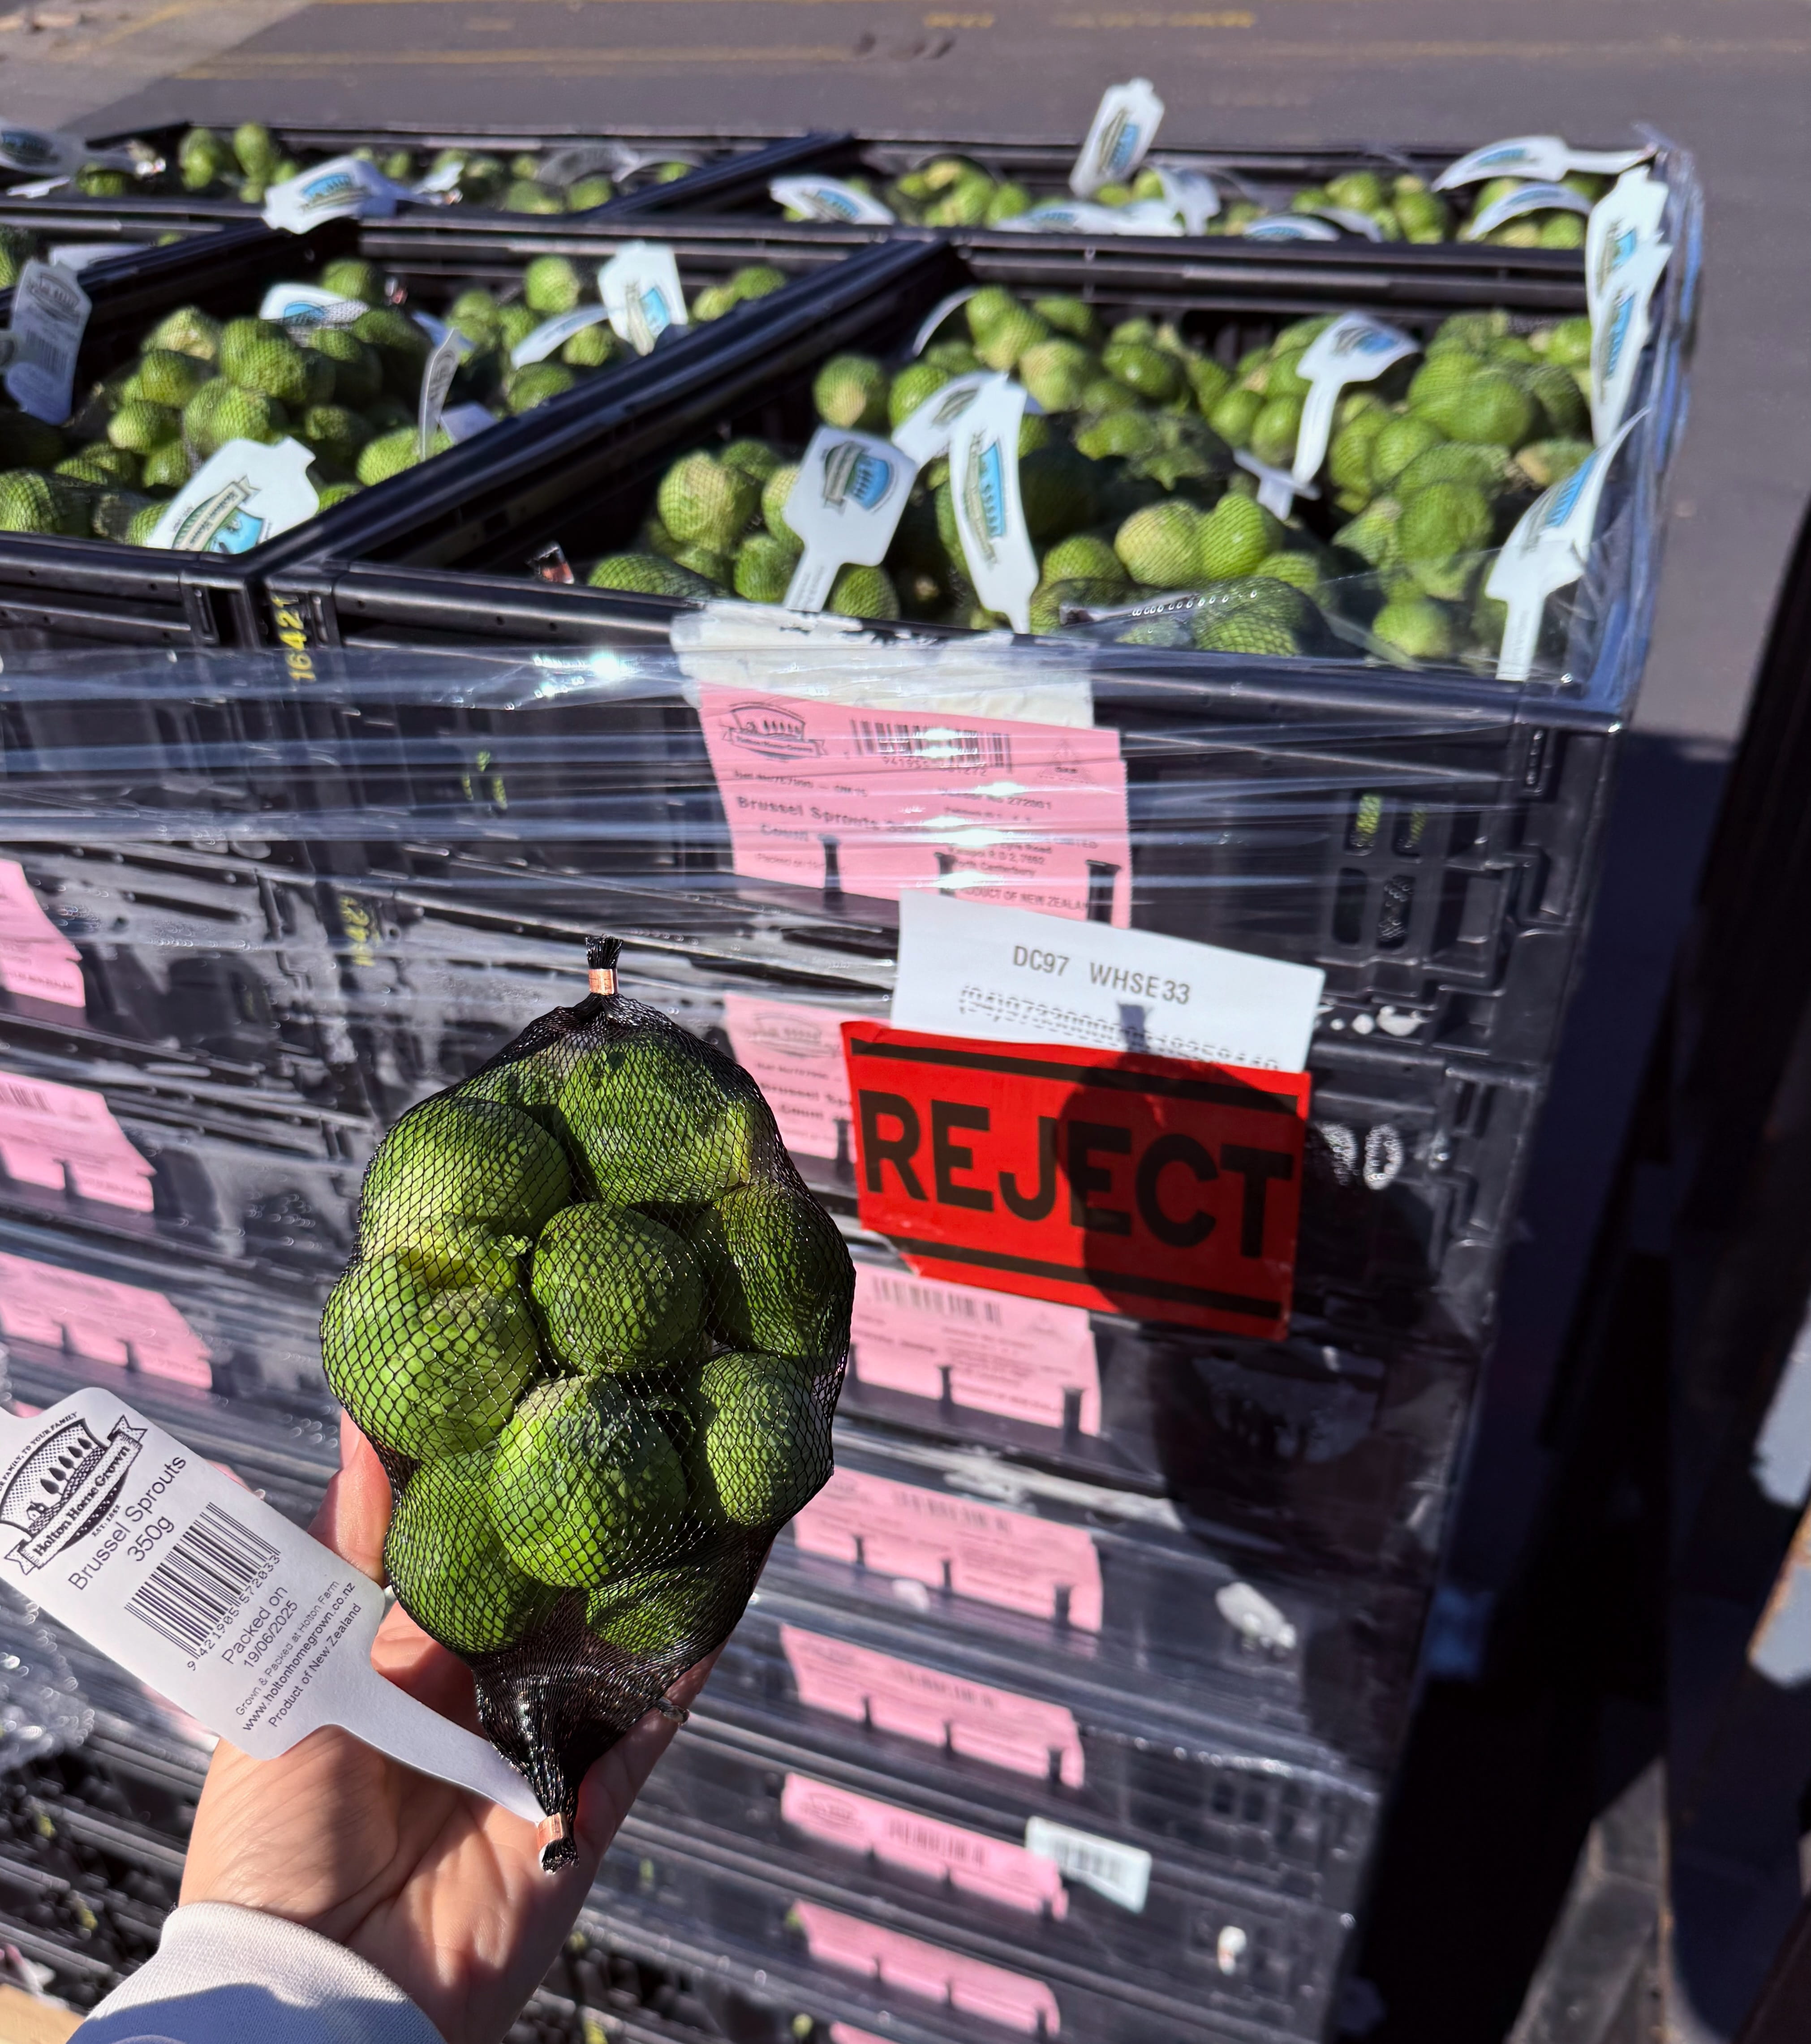
Let’s talk about something that happens every day on farms across New Zealand, but most people never see.

Most of us buy the same ten brands on repeat without really thinking about why. Not because they're the best option. Just because they're always there. Here's why.
.jpg)
These export-grade apples didn’t quite make the cut overseas, but nothing about their flavour or crunch is missing.

Eating seasonally means better food, less waste, and stronger support for local growers. It’s an easy shift that changes how you shop without overthinking it.


tell us what you think